
how_to_install_the_library_in_eclipse
How to Install kareljrobot.jar in an Eclipse Project
- Go tho the workbench, Under the
Filemenu, selectNew Java Project - Give the project a name (for example
Karel J Robot)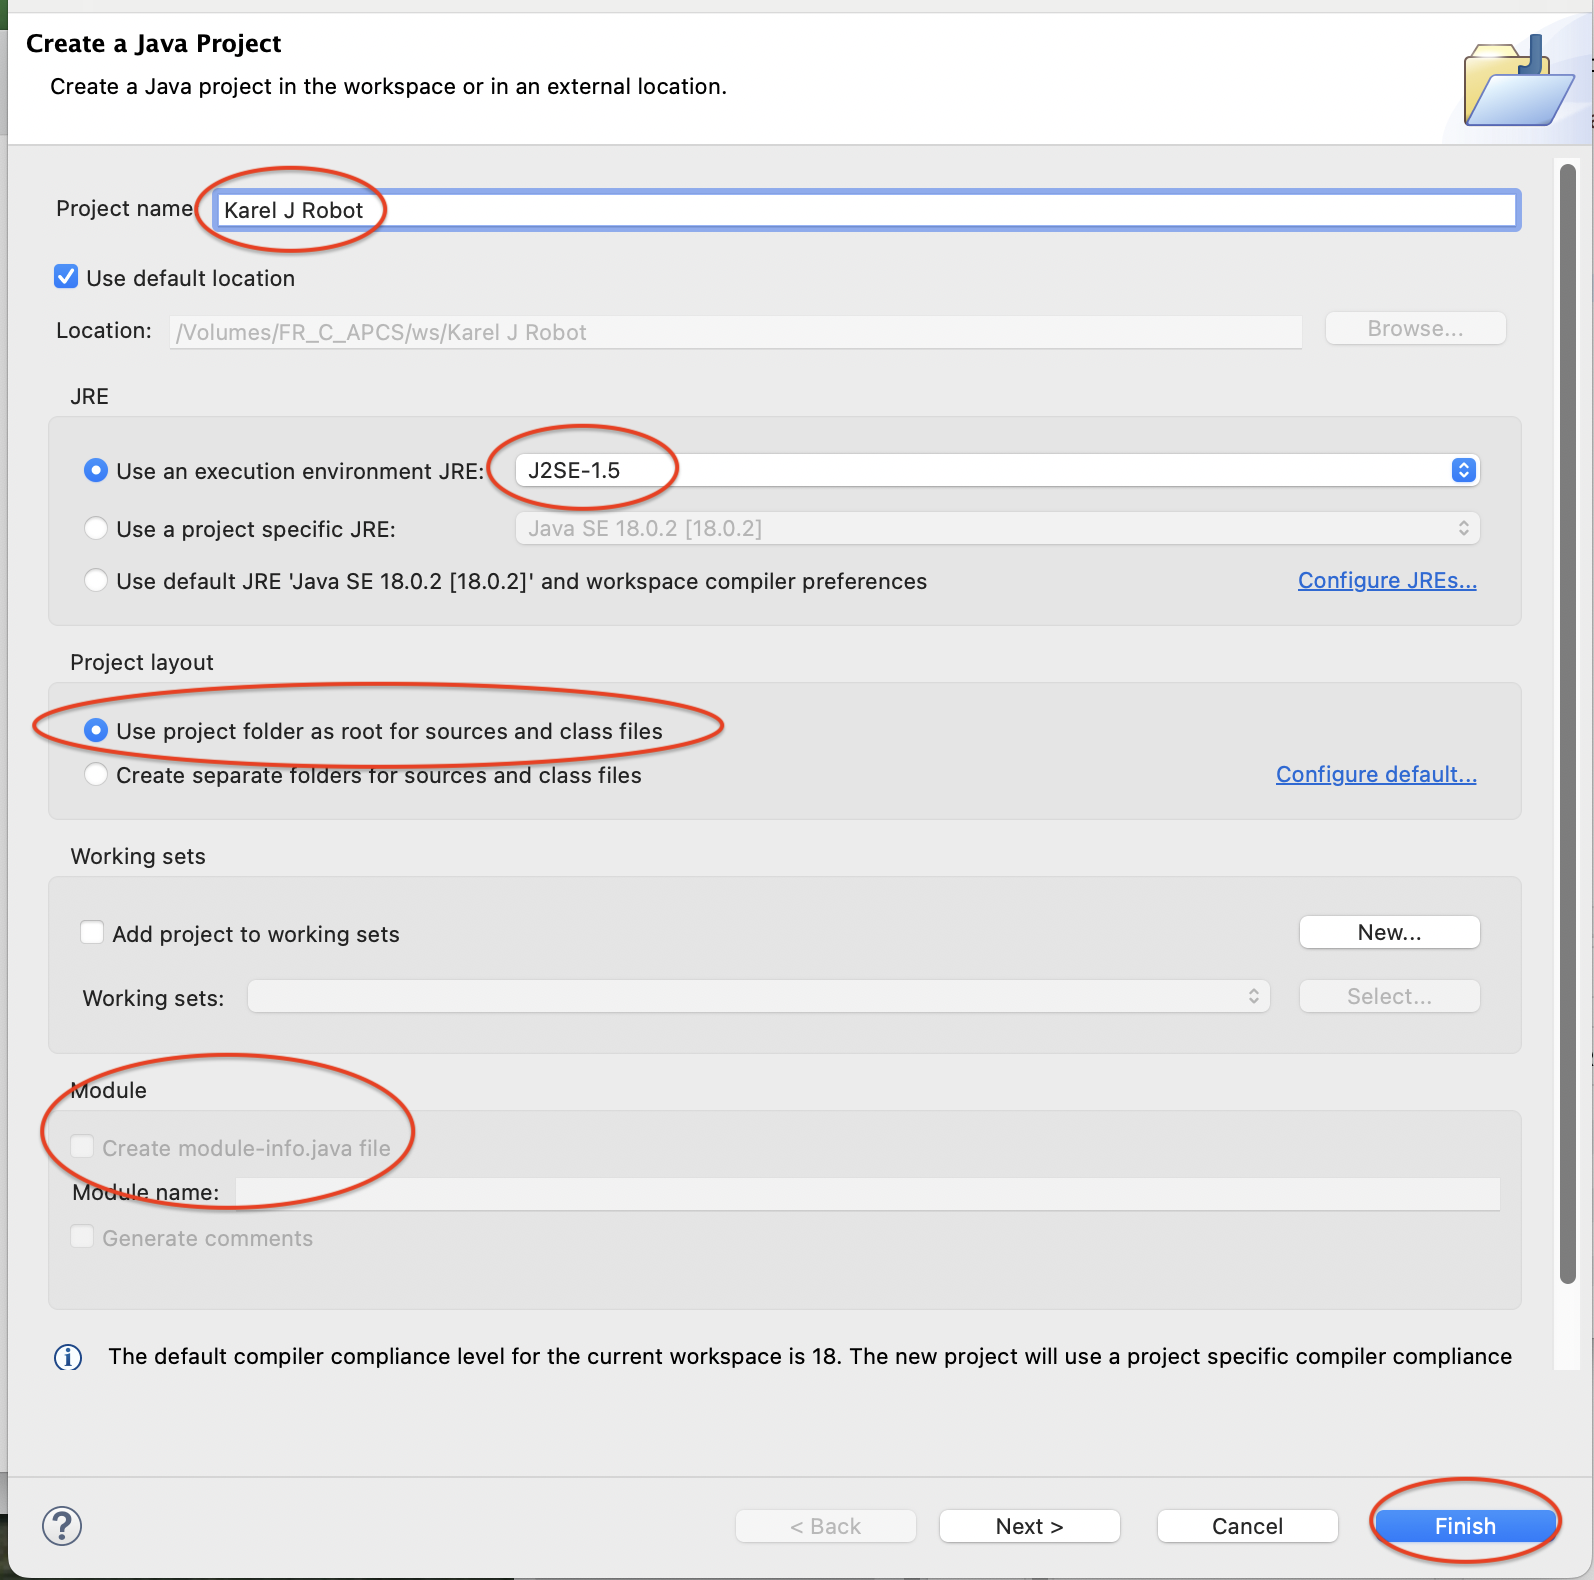
- In the
JREarea, selectuse an execution environment JRE J2SE-1.5 - In the
Project Layoutarea, selectUse project folder as root for sources and class files - Uncheck
create module-infojava file. - Press the
Finishbutton, even if you don't speak Finnish. - Now right-click the new Project and select
Preferencesat the bottom (or pressAlt-Enteror pressCommand-Ion a mac orControl-Ion Windows) - Click once on the left to select
Java Build Path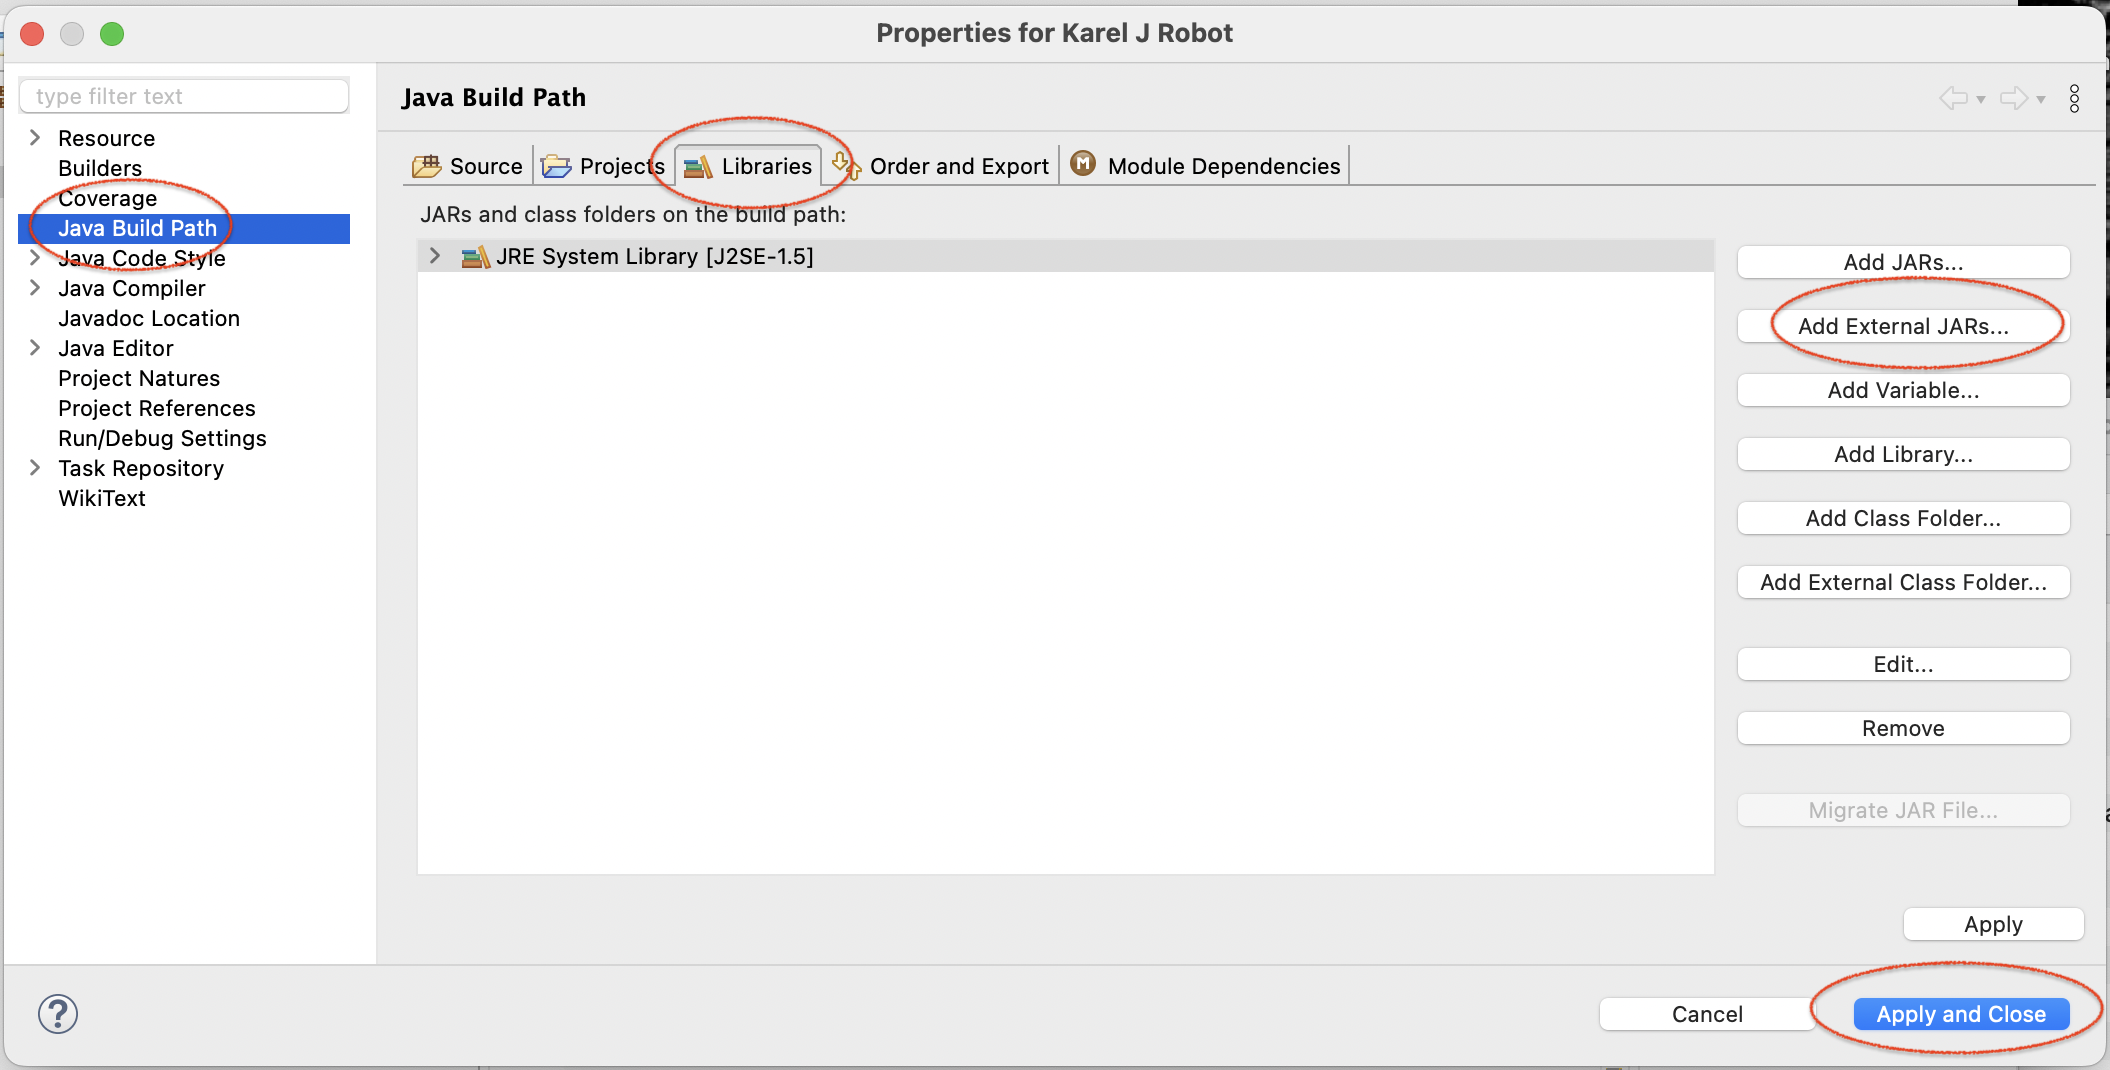
- Click once on the third tab called
Libraries - Click the second button down called
Add External JARs - Place the
KarelJRobot.jarfile you downloaded earlier into your new project folder (Do this usingFinderon Mac orFileson Windows) - Go back to eclipse and select the
KarelJRobot.jarfile you just dropped into the project folder. - Press the
Openbutton - Press the
Apply and Closebutton - Make a new class
RCRunnerto test it out: From the File menu, selectNew → Class(or press theC+button. ) and name classRCRunner. Paste the follwing code:


  import java.awt.Color;
  import kareltherobot.*;
  public class RCRunner implements Directions {

	// Main entry point
	public static void main(String[] args) {
	   World.setDelay(10);
           World.placeBeepers(2, 1, 1);
           World.setVisible();
           RemoteControl karel = new RemoteControl(3, 1, East, 3 , Color.RED);
	}
}
how_to_install_the_library_in_eclipse.txt · Last modified: 2023/08/26 11:51 by frchris